Migrating ResDiary’s TeamCity Server to AKS

In my previous post I described how to run a TeamCity server in AKS, allowing you to gain all the benefits of containerisation and Kubernetes including efficiency savings, a consistent and easily reproducible way of deploying your infrastructure, and a clear separation of your compute and data.
What I didn’t cover in my previous post was what to do if you already have an existing TeamCity server installed on a Virtual Machine, or bare metal. So in this post, I want to talk about the steps involved in migrating our existing TeamCity server from a virtual machine to an AKS cluster.
Migration Plan
The rough plan for the migration was as follows:
- Turn off our current TeamCity server.
- Take a backup of the existing TeamCity database.
- Restore the TeamCity database into our new Azure hosted MySQL server.
- Copy our existing TeamCity data onto a new Azure Managed disk.
- Edit our TeamCity config for our new server.
- Start the new TeamCity server.
- Update our DNS entries to point to it.
- Update our existing build agents to connect to our updated TeamCity server.
Resource group structure
I’m going to assume we have the following resource groups setup:
| Group | Description |
|---|---|
| my-group | Contains our AKS cluster |
| my-group-data | Used to store our TeamCity data disk |
Although we could have used a Persistent Volume Claim to automatically provision storage for TeamCity, I decided against this for a few reasons:
- I wanted to keep our storage separate from our AKS cluster, and using a PVC would have created it under the AKS cluster’s automatically created resource group.
- I wanted a single resource group that contained all of our data for the cluster, and nothing else.
- Because we had an existing disk I wanted to migrate, it was easier to manually create a new disk and clone the data than allowing a PVC to be created and then copying onto the automatically provisioned disk.
Stopping the Server
Before migrating any data, I shut down the TeamCity service to make sure none of the data changes while we’re migrating it:
$ sudo service teamcity stop
Backing up the existing MySQL server
Our existing TeamCity server virtual machine ran both the TeamCity server itself, along with its MySQL database. As part of the work of moving to AKS, I wanted to separate the data from the compute, and make use of the Azure Database for MySQL Server managed database service. This meant that I needed to backup the current database, and restore it into an Azure database.
To create the database backup, I ran the following command on the machine hosting the current TeamCity MySQL database:
$ mysqldump -u teamcityuser -h localhost -p teamcity > teamcity-<date>-dmp.sql
Creating our new MySQL database
I used the mysql command to connect to our new Azure MySQL server:
$ mysql -u admin@my-sql-database -h my-sql-database.mysql.database.azure.com -p
I then created a new, empty database and a user account, following the recommendations from Jetbrains:
create database teamcity collate utf8_bin;
create user teamcity identified by '<password>';
grant all privileges on teamcity.* to teamcity;
grant process on *.* to teamcity;
Once the database had been created, I switched to it and imported the backup:
use teamcity;
source teamcity-<date>-dmp.sql
TIP: Using the source command instead of running the script directly via the mysql command handles continuing the import after a connection loss, which was occasionally happening to me.
Copying our TeamCity data onto a new disk
To copy our TeamCity data onto a new Azure managed disk, I created a copy of our existing disk, created a new disk, and then used dd to copy the data from one to the other. This is a bit of a convoluted process, but the reason I had to do it was because of an issue that I came across while trying to do the migration, described in https://github.com/kubernetes/kubernetes/issues/63235.
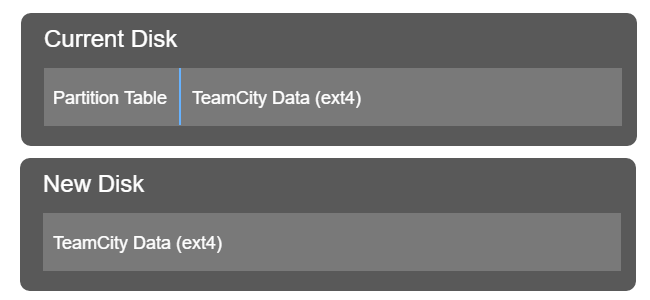
The problem is that the Azure Disk Kubernetes driver doesn’t support disks containing partitions. Since our existing TeamCity server was setup by hand, the data disk contains a single partition. What happened was that when Kubernetes mounted the disk, it didn’t detect an ext4 filesystem, and it formatted the disk.
To work around this, I had to copy the ext4 partition on our existing TeamCity disk into the root of a new disk. You can visualise what I was starting with, and what I needed to get to in the following diagram:
I started by creating a new disk based on my existing TeamCity disk:
az disk create --name teamcitydata-old --resource-group my-group-data --size-gb 100 --location westeurope --source "https://abcd.blob.core.windows.net/vhds/v123456.87954632212315656.vhd"
You can get the URI for the --source parameter by viewing your existing disk in the Azure portal.
Next, I created an empty disk to contain our TeamCity data:
az disk create --name teamcitydata --resource-group my-group-data --size-gb 100 --location westeurope
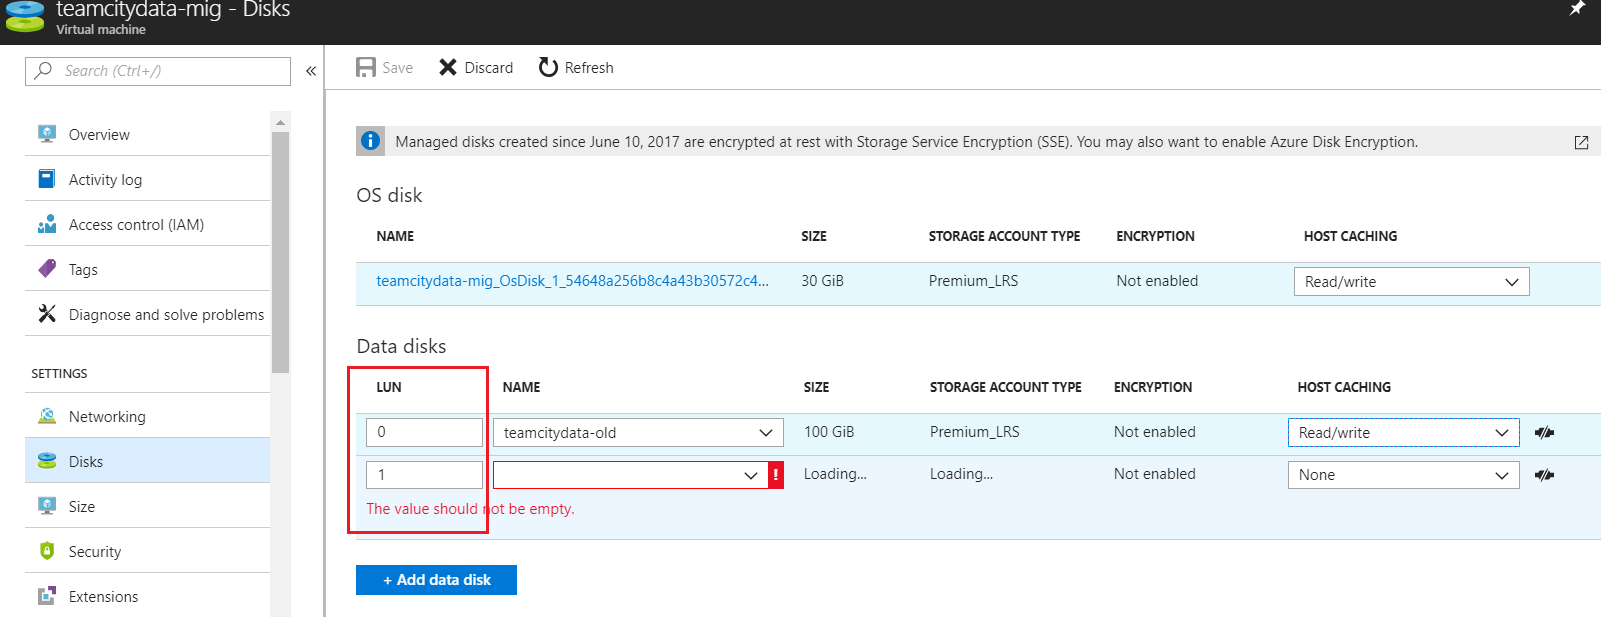
I then attached both disks to an Azure VM, as shown in the following screenshot. This VM is just being used to copy the data from one disk to the other, so you can either use an existing VM or create a new one for the purpose:
Once the disks are attached, the physical devices can be found at /dev/disk/azure/scsi1. You can list them by running ls -l /dev/disk/azure/scsi1:
$ ls -l /dev/disk/azure/scsi1/
total 0
lrwxrwxrwx 1 root root 12 May 24 10:47 lun0 -> ../../../sdd
lrwxrwxrwx 1 root root 12 May 24 10:47 lun1 -> ../../../sdc
lrwxrwxrwx 1 root root 13 May 24 10:47 lun1-part1 -> ../../../sdc1
In the example above, we have two devices (lun0, and lun1), and lun1 has a single partition on it (lun1-part1).
I copied the data from the TeamCity data partition onto the device using the following command:
$ sudo dd if=/dev/disk/azure/scsi1/lun1-part1 of=/dev/disk/azure/scsi1/lun0 bs=64M status=progress
42948624384 bytes (43 GB, 40 GiB) copied, 4128.42 s, 10.4 MB/s
This process took just over an hour when I did it.
Once the data was copied, I resized the ext4 filesystem to use up all the available space on the disk. First I ran e2fsck on the new disk:
$ sudo e2fsck -f /dev/disk/azure/scsi1/lun0
e2fsck 1.43.5 (04-Aug-2017)
Pass 1: Checking inodes, blocks, and sizes
Pass 2: Checking directory structure
Pass 3: Checking directory connectivity
/lost+found not found.  Create<y>? yes
Pass 4: Checking reference counts
Pass 5: Checking group summary information

/dev/disk/azure/scsi1/lun0: ***** FILE SYSTEM WAS MODIFIED *****
/dev/disk/azure/scsi1/lun0: 186966/2621440 files (6.3% non-contiguous), 8714920/10485504 blocks
I then ran resize2fs to extend the filesystem to use up the full disk:
$ sudo resize2fs /dev/disk/azure/scsi1/lun0
resize2fs 1.43.5 (04-Aug-2017)
Resizing the filesystem on /dev/disk/azure/scsi1/lun0 to 26214400 (4k) blocks.
The filesystem on /dev/disk/azure/scsi1/lun0 is now 26214400 (4k) blocks long.
Adjusting the TeamCity data
Before we could actually use our TeamCity data drive, I had to fix a few things:
- I had to reorganise the directory structure slightly because our existing TeamCity data directory wasn’t in the root of the drive.
- I altered the hostname in the
conf/main-config.xmlfile. - I altered the database connection properties in the
conf/database.propertiesfile to point at the new database.
I started by mounting the new data disk onto a folder on my VM:
$ sudo mkdir -p /mnt/teamcitydata
$ sudo mount /dev/disk/azure/scsi1/lun0 /mnt/teamcitydata
I could then access the TeamCity data files at /mnt/teamcitydata. Once finished, I unmounted the disk and removed the /mnt/teamcitydata directory:
$ sudo umount /mnt/teamcitydata
$ sudo rmdir /mnt/teamcitydata/
Finally - I detached both disks from the VM so that they could be attached to a node in the Kubernetes cluster. At this point the teamcitydata-old disk can be deleted.
Giving AKS permission to access the disk
By default your AKS cluster won’t be able to access your disk. In order for it to be able to access it, you need to grant the Service Principal for the cluster the Contributor role on the disk. From my testing I seemed to need to grant the access at the disk level, rather than at the subscription level, but it’s possible that I was doing something wrong.
To do this, I first found the Service Principal Id of the AKS cluster:
az aks show --resource-group $AksResourceGroup --name $AksName --query "servicePrincipalProfile.clientId" --output tsv
Next, I got the Id of the disk:
az disk show --resource-group $DiskResourceGroup --name $DiskName --query "id" --output tsv
Finally, I used az role assignment create to give the AKS cluster access to the disk:
az role assignment create --assignee $ServicePrincipalId --role Contributor --scope $DiskId
Mapping the disk to the TeamCity container
In order for TeamCity to be able to access the data disk, I added an azureDisk volume to the pod spec:
- name: teamcitydata
  azureDisk:
    kind: Managed
    cachingMode: ReadWrite
    diskName: teamcitydata
    diskURI: /subscriptions/<subscriptionId>/resourceGroups/my-group-data/providers/Microsoft.Compute/disks/teamcitydata
Next, I mounted it onto the TeamCity container:
containers:
  - name: teamcity
      image: jetbrains/teamcity-server:10.0.5
      ...
      volumeMounts:
      - mountPath: "/data/teamcity_server/datadir"
          name: teamcitydata
The full deployment definition looked something like this:
apiVersion: apps/v1beta1
kind: Deployment
metadata:
  name: teamcity
spec:
  replicas: 1
  strategy:
    type: Recreate
  template:
    metadata:
      labels:
        app: teamcity
    spec:
      volumes:
        - name: teamcitydata
          azureDisk:
            kind: Managed
            cachingMode: ReadWrite
            diskName: *volName
            diskURI: /subscriptions/<subscriptionId>/resourceGroups/my-group-data/providers/Microsoft.Compute/disks/teamcitydata
      containers:
        - name: teamcity
          image: jetbrains/teamcity-server:10.0.5
          env:
            - name: TEAMCITY_SERVER_MEM_OPTS
              value: "-Xmx4g -XX:ReservedCodeCacheSize=350m"
          volumeMounts:
            - mountPath: "/data/teamcity_server/datadir"
              name: teamcitydata
I was then able to start the TeamCity server the usual way:
kubectl apply -f teamcity.dep.yaml
Wrapping up
In this post, I covered how to take an existing TeamCity server and migrate it into an AKS cluster without losing build configurations, history or artifacts. I described a fairly simple process for doing the migration that also left the existing server unmodified in case we needed to switch back for any reason.
Although it took me some experimentation before I came up with the plan described in this post, when I actually performed the migration itself, it went smoothly without any problems.
In future posts I’ll continue describing our journey of moving our build infrastructure over to Kubernetes.